

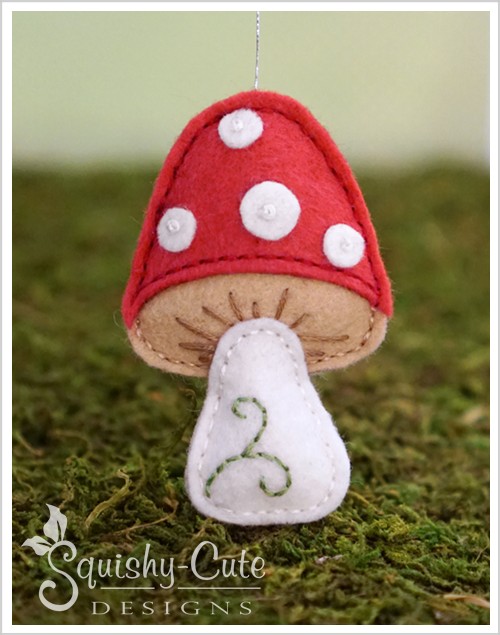
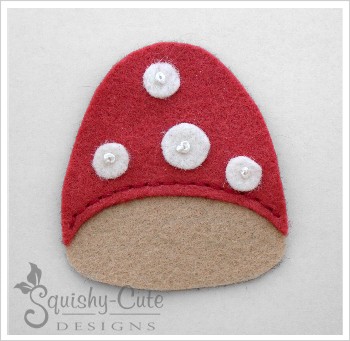
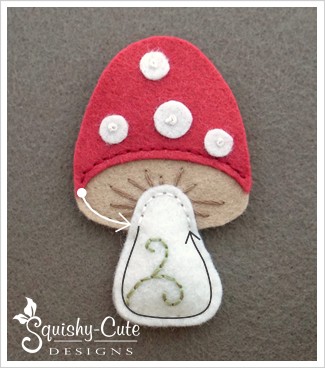
Felt Mushroom Pattern
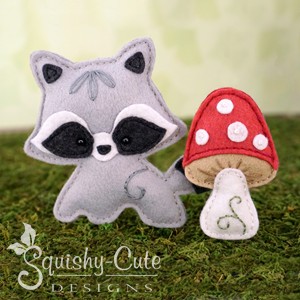
This felt mushroom is a free bonus pattern that was designed to accompany our Woodland Babies Collection of hand-sewing patterns. Learn how to make this darling little felt mushroom with our easy step-by-step instructions and free download PDF pattern. This mushroom would be a fun accent for any woodland themed decor. And it would be cute as part of a woodland mobile or as an ornament! Since this mushroom goes nicely together with our Woodland Babies, it would be perfect to pair it with any or all of the baby critters in our collection. Visit our Woodland Babies sewing patterns to see the entire collection.
![]()
![]()

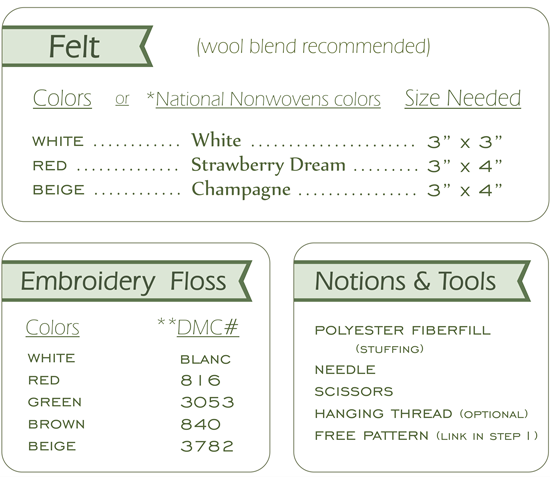
*The felt we use is a wool felt blend made by National Nonwovens. For a list of suppliers, please visit our suppliers webpage. These National Nonwovens colors are only a suggestion. If a color listed above cannot be found, you will need to select a substitute.
**DMC numbers match National Nonwovens felt colors listed above.

Download Free Mushroom Pattern
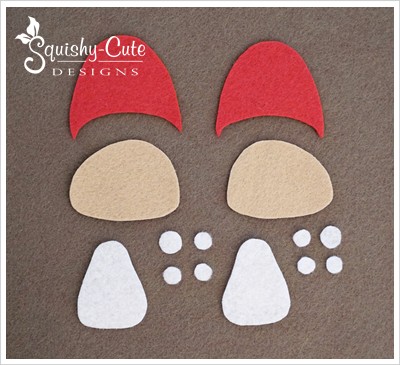

Cut Out Pattern Pieces
Begin by printing out the free mushroom sewing pattern. Cut all pieces out of felt as indicated on each pattern piece. See photo.
![]()
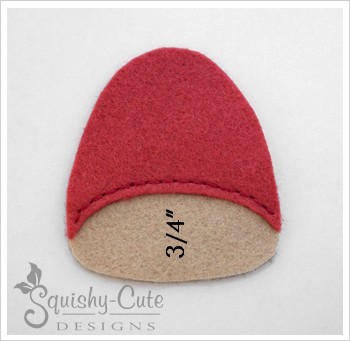

Sew Cap To Gills
Place cap on top of the gills piece with about 3/4″ of the gills showing. Using one strand (knot tail-ends together for a working thickness of 2 strands) of red floss #816, backstitch along the bottom curve of the cap about 1/16″ in from the edge. Repeat this for the other side of the mushroom.
![]()
Sew On Spots
Randomly place the spots onto the cap at least 1/8″ in from the outer edge. Using 2 strands (working thickness: 4 strands) of white floss, secure each spot in place with a French knot in the center. Repeat this for the other side of the mushroom.
![]()
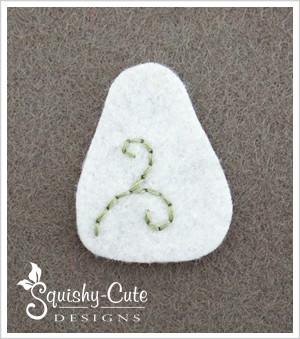

Sew On Swirls
To get the swirls in the right place, use the stem pattern piece as your embroidery guide. For help with transferring the swirls onto your felt, see our Transfer Methods page. Now, using 2 strands (working thickness: 4 strands) of green floss #3053, backstitch the swirls onto the two stem pieces. The swirls can be either opposite facing on either side of the mushroom, or the same direction; this is not too important.
![]()
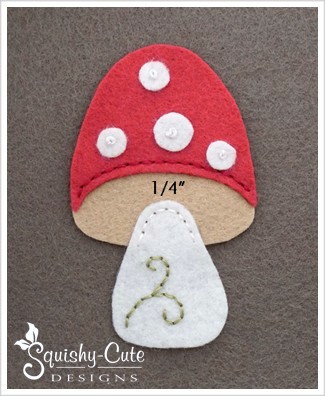

Sew Stem To Gills
Center the stem onto the gills about 1/4″ down from the bottom edge of the cap. Using 1 strand (working thickness: 2 strands) of white floss, backstitch the stem onto the gills. Sew about 1/16″ in from the top edge of the stem and only sew the part that overlaps the gills. See photo to right. Repeat this for the other side of the mushroom, but be sure that the stems are placed so that they will line up evenly when the two sides of the mushroom are sewn together.
![]()


Sew Lines Onto Gills
Using the gills pattern piece as your embroidery guide, sew long single stitches of varying lengths onto the gills piece with two strands (working thickness: 4 strands) of brown floss #840. Repeat for the other side of the mushroom.
![]()

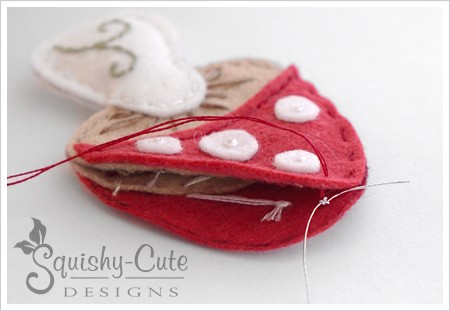
Sew Mushroom Together
Place both mushroom pieces together with edges evenly lined up. With 1 strand of floss (working thickness: 2 strands), you will be sewing around the perimeter using the double running stitch. Start along the gills with beige floss #3782 and then switch to white floss for the stem, and red floss for the cap. As soon as you finish sewing around the stem, you’ll want to lightly stuff it before you continue. Then, if you don’t intend to insert any kind of hanging thread, continue sewing up the cap and stuffing as you go. Your mushroom is complete!
![]()
For ornament
If you plan to turn this mushroom into an ornament, cut a length of thread that is about twice as long as you want the hanging loop to be. Then tie the tail-ends together. Place this knot at the top of the mushroom between the layers. Then, as you sew up around the cap, your stitches will secure this thread in place, trapping the knot inside the mushroom. Then finish sewing and stuffing the last bit of the mushroom, and knot off your floss. It is complete!
![]()
For a Mobile
If you plan to use this mushroom in a mobile, cut a piece of thread to your desired length. Then, sew up around the cap until you are at the top. Now gently pull the two layers of mushroom open a little, so that you can see the red floss that is going in-between. Take your thread, and tie a knot around the red floss that is between the layers. Then tuck the tail end of the thread down between the layers (or cut it very short), and gently pull your red floss until it is snug again. Now you can continue sewing up the cap, and stuffing as you go.
Your mushroom is now complete!

![]()
![]()
Check out our
Woodland Babies Collection
to purchase our baby animal patterns!
ROXY THE RACCOON BABY

BERNIE THE BABY BEAR
![]()
![]()
You may also like….
Felt Tree Stump
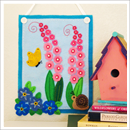
Felt Garden Banner

Felt Photo Album
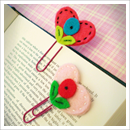
Felt Heart Bookmarks
![]()
We hope you enjoyed this mushroom sewing pattern! Looking for more sewing patterns? Then check out some of our other free sewing patterns like the ones shown above. Thanks so much for stopping by, and happy sewing everyone!
![]()
![]()
![]()