

Easy Sewing Projects: Garden Banner
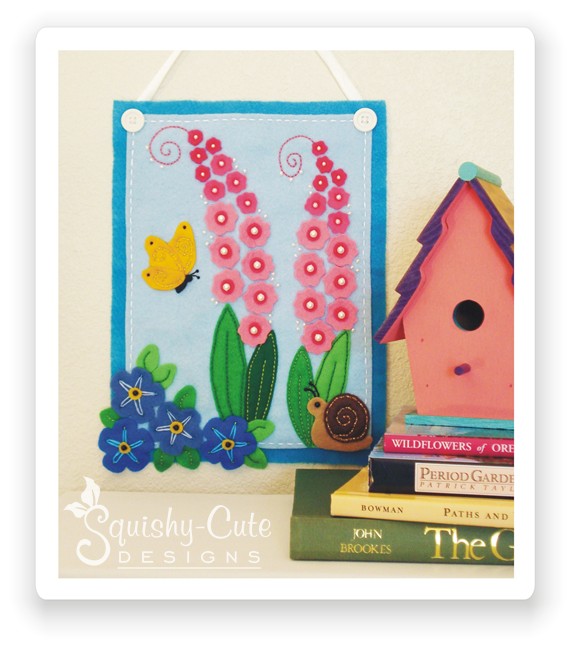
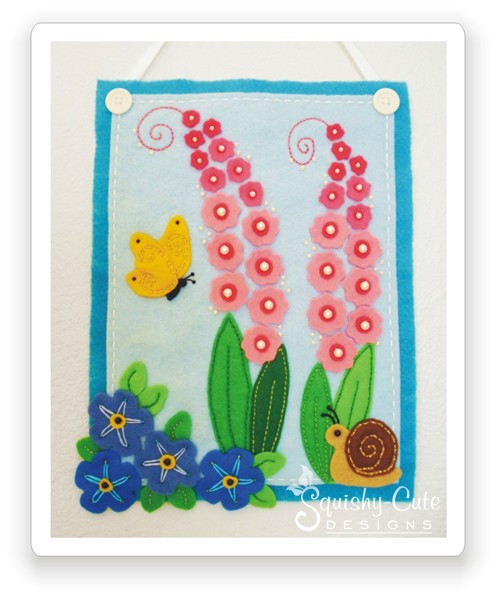
Looking for some easy sewing projects? Then you might want to try our felt garden banner. It’s an adorable mini banner featuring a lot of beadwork and easy-to-do embroidery stitches. This is one of our free sewing patterns, so enjoy everyone!
![]()
![]()
![]()
![]()
![]()

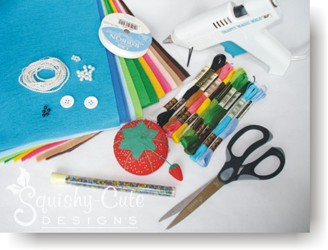
- Felt: 9″ x 12″ sheet of turquoise and light blue
- Other felt: 2 shades blue, 3 shades green, 3 shades pink, yellow, tan, brown, black
- Embroidery floss: white, pink, black, yellow, light brown, 3 shades green, 2 shades blue
- White ribbon: 15″ long and 3/8″ – 1/2″ wide
- 2 White buttons: 3/4″ wide
- 14 White pearl beads: 1/4″ wide
- 7 White pearl beads: 3/16″ wide
- 45 White pearl beads: 1/8″ wide
- 5 Black round beads: 3/16″ wide
- 7 Black seed beads
- 20 Blue seed beads
- 45 Yellow or gold seed beads
- 35 Light brown or gold seed beads
- Sewing needle
- Thin seed bead needle
- Scissors
- Hot glue gun
- Thin cardboard
- Garden banner pattern
![]()


To start your banner, cut your turquoise sheet of felt so that it is about 9″ X 12″. If you buy the small sheets at the craft store, it should probably already be about this size. Then trim down the sheet of light blue felt so that it is about 8″ X 11″. This way when you place it on the turquoise sheet, you will have a 1/2″ border of turquoise showing around the edges. Now sew the light blue felt onto the turquoise felt with white embroidery floss, using the running stitch around the edge.

Now print and cut out the garden banner pattern.
![]()
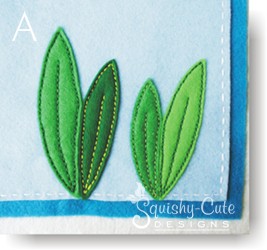

Trace and cut out the four large leaves using at least three different shades of green felt. Sew the leaves on in the lower right-hand corner. The base of the leaves should be at the edge of the light blue felt. Sew them into place with contrasting shades of green embroidery floss, using the backstitch. Be sure that these leaves are over far enough to the right side so that the butterfly will still fit after the pink flowers have been sewn on. See photo A.

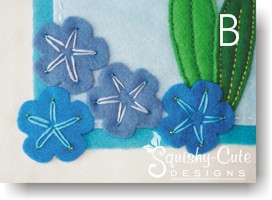
Using two different shades of blue felt, cut out the four large flowers. Sew these flowers on the lower left-hand corner of the banner. They can be randomly placed in the corner with them flowing over onto the turquoise border as shown in photo B. To stitch them to the banner, use the lazy daisy stitch in two different shades of blue floss. On the tip of each lazy daisy stitch, sew on a blue seed bead. They can be sewn on during the lazy daisy stitch or after you have completed them all. See photo B. Now anchor each yellow center to the flowers with a black bead, all in one step. See photo C.
![]()


Trace and cut out eight small leaves using at least two different shades of green felt. Then, in a contrasting shade of green floss, use the backstitch down the center of each leaf to sew these leaves into place. Again, see photo C.
![]()
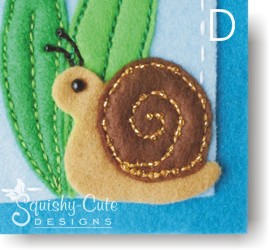

Trace and cut out the snail’s body using tan felt. Be sure to cut the entire outline of the snail (body and shell) out of the tan felt, as one piece. Then cut out the shell using brown felt. Sew the snail to the lower right-hand corner. Place the shell on top of the tan body and sew both pieces into place by stitching around the shell only. Stitch the shell on by using the backstitch with light brown floss. Go around the entire edge of the shell and then stitch a swirl in the center of the shell. See photo D. The snail’s tan body does not require stitches because it’s being anchored by the stitches on the shell and the eye bead. To add a little sparkle to the shell, sew on a few gold, or light brown seed beads along the stitches on the shell. Next, sew on a black bead for the eye and then use the backstitch in black floss to stitch on the snail’s antennas. To finish the antennas, sew on black seed beads or sew French knots to the ends of each antenna.
![]()

Trace and cut out the following:
Pattern A: Cut 14 in lightest pink
Pattern a: Cut 14 in darkest pink
Pattern B: Cut 7 in medium pink
Pattern b: Cut 7 in darkest pink
Pattern C: Cut 8 in darkest pink
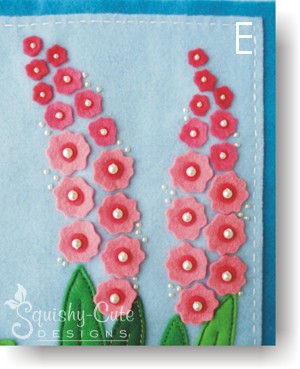
Sewing on each flower will go pretty fast because you simply attach each flower and it’s center onto the banner with a pearl bead. No other stitching is needed. Place the large pattern pieces “A” and “a” together (with a 1/4″ wide pearl bead in the center) at the base of the flowers. Next, place the pattern pieces “B” and “b” together with a 3/16″ wide pearl bead and then pattern “C” with a 1/8″ wide pearl bead at the top of each flower spike.
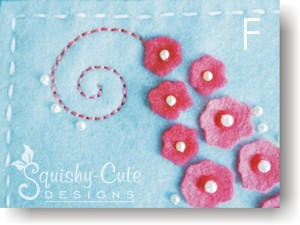
Pattern “C” has no felt centers. See photo E. After the flowers are sewn in place, randomly sew on some of the tiny 1/8″ pearl beads around the flowers. Sew them on in clusters of two or three. Again, See photo E. Now to finish each flower spike, stitch a swirly vine off the tip of each spike. Use the backstitch with dark pink floss to stitch the swirl design and then add three small 1/8″ pearl beads to the swirl. See photo F.


Trace and cut out the butterfly’s body using black felt and its wings out of yellow felt. Start the butterfly by anchoring its wings in place with a black seed bead at the tip of each wing. Next, place the butterfly’s body underneath the wings. It’s very important to make sure that the body piece is tucked under the wings enough that it will get anchored onto the banner while stitching on the wings. See photo G. Now, using the backstitch with light yellow floss, stitch a swirl design on to each wing, making sure to anchor the body as you go. The body piece does not need to be stitched down. To finish the butterfly, use the backstitch with black floss to make its antennas. Then sew on a black seed bead or French knot to the end of each antenna. To add a little sparkle to the wings, sew on a few gold or yellow seed beads along the stitches on the wings.
![]()

Sew the two ends of your ribbon (about 15″) to the top corners of your banner. Then to cover your stitches, sew a white button over them in each corner.
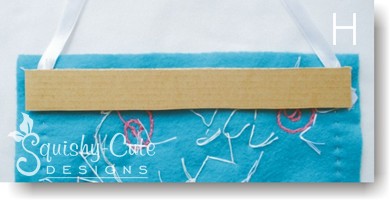

To keep your banner from sagging when hanging on the wall, cut about a 1″ by 8″ strip of cardboard, and glue it across the top of the back of the banner. Only glue the two ends of the cardboard strip, and be sure to place the glue behind the two large white buttons. This way no glue will show from the front. You could use any type of glue that you would like, but we suggest using hot glue. See photo H.
Your beaded garden banner is now finished!
Return to Free Sewing Patterns from Easy Sewing Projects: Garden Banner
Return to Home Page