

How To Do The Ladder Stitch
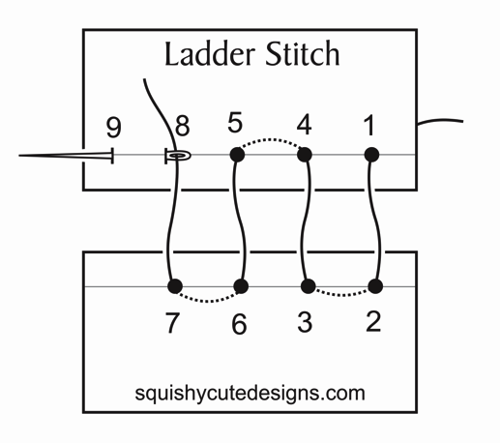
The ladder stitch can be used to close the opening of a turned seam on things like pillows, stuffed animals, dolls, or bags. The ladder stitch will close the turning hole with an invisible stitch that will blend in with the rest of the seam. The ladder stitch is also called the slip stitch, blind stitch, or hidden stitch.
![]()
![]()
![]()
![]()


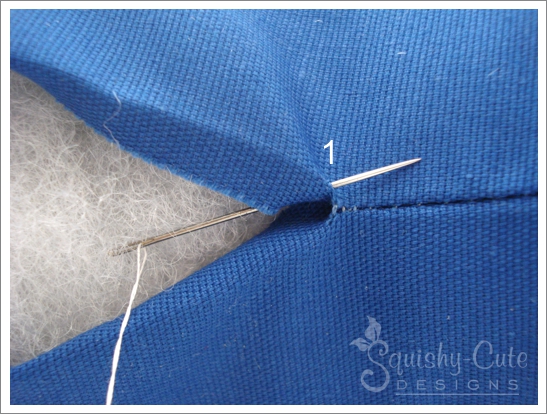
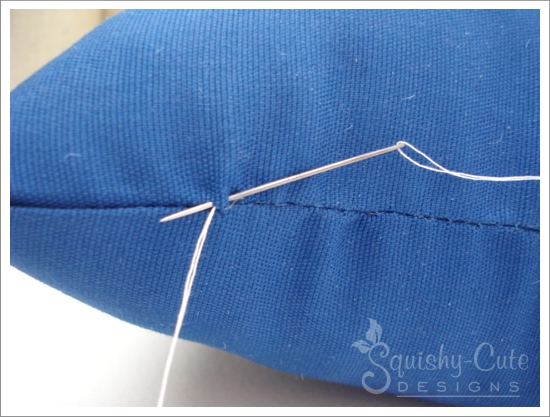
If you are closing a turned seam, it’s very helpful to iron the tucked-in seam so that it’s nice and flat. This crisp folded edge makes an easy-to-follow line to guide your stitches. Now, the first step in the ladder stitch is to hide your knot. To do this, send your needle up from underneath the folded edge of the seam and pull until the knotted end of your thread is nicely concealed inside the folded crease of the seam.

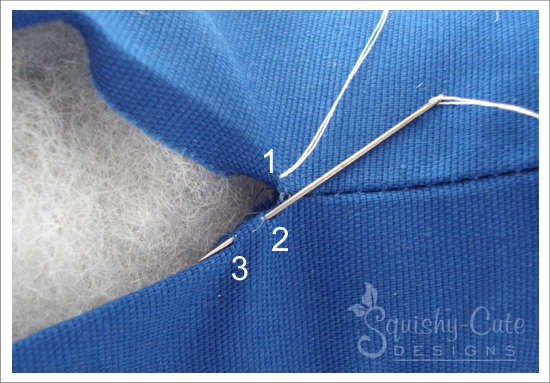
Now that your knot is hidden, you can pin the seam together, making sure that the two folded edges are evenly aligned. Or if you prefer, simply pinch the sides together as you work along the opening. Then, on the opposite side and directly across from #1, make a small stitch right along the crease, about ⅛” long, going in at #2 and out at #3. The goal is to keep your stitches running perfectly along the folded edge in order to have an even and tidy seam.

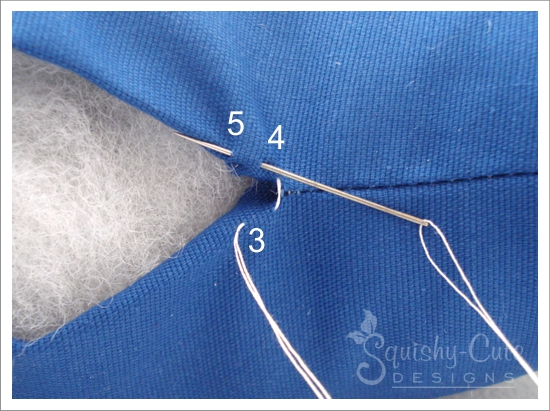
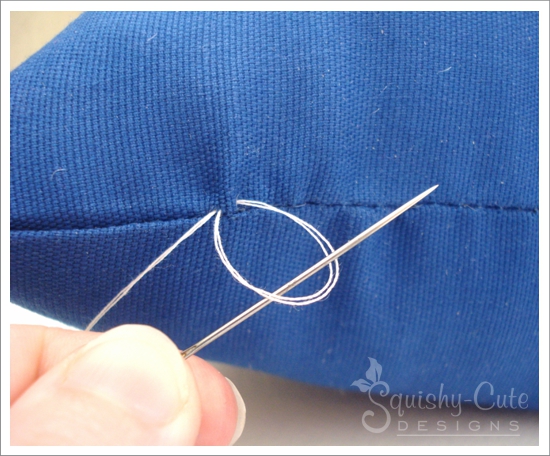
Again, directly across from #3, send your needle in at #4 and out at #5 and pull the thread all the way through.

As you continue this back and forth process, be sure to keep your stitches pulled nice and snug. We left our stitches loose to show you what it looks like. When the thread is kept taut, the stitches will disappear into the crease. When you reach the end of the opening, pull the thread to tighten the stitches one last time before knotting off your thread.


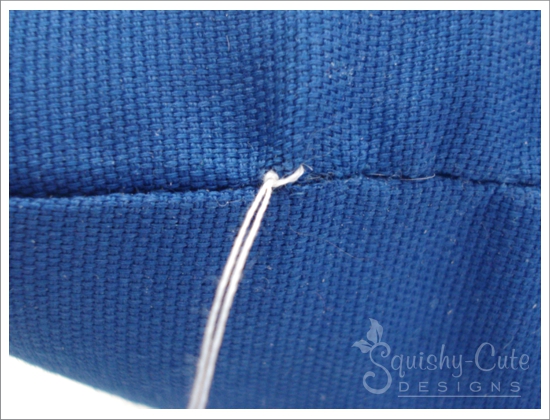
To knot off your thread, take another small stitch on the opposite side from where the thread emerges.
As you pull the loop closed, you may want to send your needle through the loop again to help create a better knot.

Once your knot is tightened against your seam, you may want to repeat this process of knotting one more time, to make sure your knot is secure.
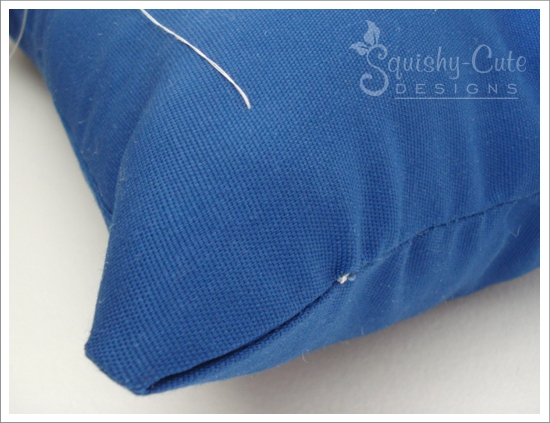
Now send your needle down right next to your knot and through the stuffing a little ways, and out the fabric. Cut the thread very close to the fabric and the tail end should disappear back into the fabric.
![]()
![]()
You may also like….
French Knot
Stem Stitch
Lazy Daisy

Satin Stitch
![]()
We hope this embroidery tutorial on the ladder stitch was helpful for you! We also have several other embroidery stitch tutorials that you might find useful. So if you enjoy hand sewing or needlework, be sure to check them out as well!
![]()
Return to Helpful Hints from Ladder Stitch
Return to Home Page