

Beginner Sewing Patterns: Patriotic Wall Hanging
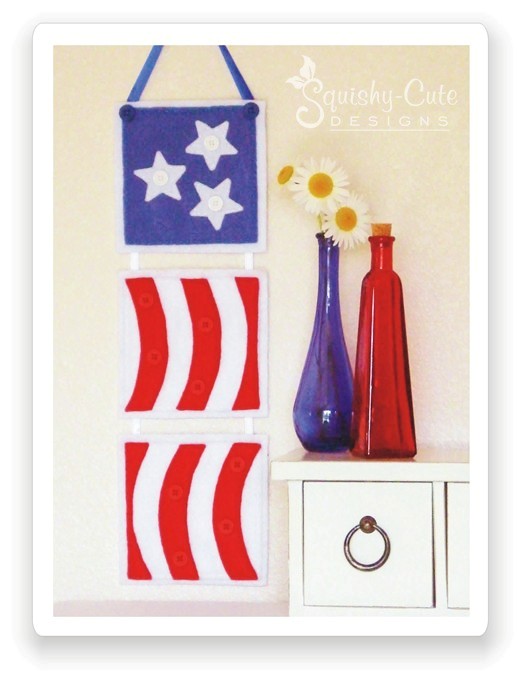
If you have been looking for some beginner sewing patterns, then this patriotic wall decoration is a very easy sewing project for you to try. It’s simple to do and would add a nice patriotic decorating touch to your home. Or if you are wanting to teach your kids to sew and need some kids sewing projects, try this easy wall decoration. This project uses inexpensive sewing and craft supplies and really easy embroidery stitches.
![]()
![]()
![]()
![]()
![]()

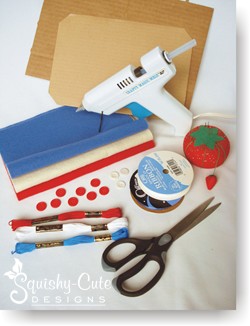
- Felt: red, white and blue
- Embroidery floss: red, white and blue
- Buttons: white and red (1/2″ wide)
- Blue ribbon (3/8″ wide, 10″ long)
- White ribbon (1/4″ wide, 24″ long)
- Cardboard
- Hot glue gun
- Needle
- Scissors
- Flag wall hanging pattern
![]()


Begin by printing out the Flag wall hanging pattern. First cut out the large square pattern, then trace and cut this out in white felt, three times. Then using the small square, trace and cut out one blue square and two white squares. The smaller squares will be stitched onto the larger squares using the running stitch around the edge.
![]()
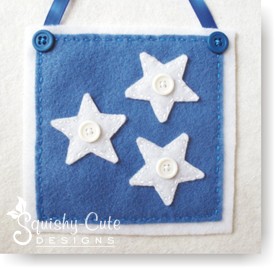

Starting with the top square (the blue square), cut out the star pattern and then trace and cut out three stars in white felt. Then place the stars where you would like them in the square. Then begin to sew them down using the running stitch around the border of each star. Now sew a white button in the center of each star.
Next, sew the piece of blue ribbon to the top corners of the blue square. Once the ribbon is in place, you can sew a blue button in each of the top corners to hide the stitching from the ribbon. Now your first square is complete. See photo for details.
![]()
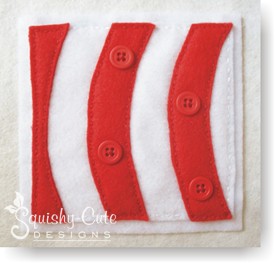

Next will be the two red and white striped squares. Trace and cut out the stripes in red felt. Now arrange three red stripes on each white square as shown in the photo. Sew these on using the running stitch around the border. Now for added interest, sew several red buttons down on the stripes. See the photo for details.

Now that you are done embroidering all three squares, you are almost done! Before it is done however, you must support the back of each square with cardboard. Cut out three squares of cardboard that are about 4-3/4″ x 4-3/4″. To glue each square down, place a small glob of hot glue in each of the four corners. You may want to glue one corner at a time so the glue doesn’t harden and you can pull the felt nice and tight for each corner.
![]()
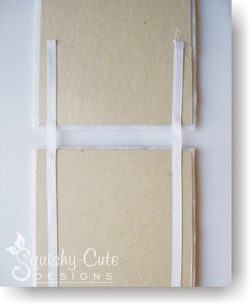

To connect all three squares, you will now glue a white ribbon about 12″ long (cut your 24″ piece in half) down one side of the cardboard backs. Then do this for the other side as well. Of course before you do so, be sure to arrange the squares how you want them, and have them evenly spaced. We spaced ours about 1/2″ between each square. See the photo for how this should look.
You are now done with your patriotic wall hanging!
![]()
![]()
Return to Free Sewing Patterns from Beginner Sewing Patterns: Patriotic Wall Hanging
Return to Home Page